To create a basic bot using Visual Studio 2019 or Visual Studio 2022, follow the steps below to create a working skeleton project you can build upon.
- Make sure you have Visual Studio 2019 or 2022. Community, Professional or Enterprise work fine. These instructions are not for Visual Studio Code. You can download the correct version here. Note that older versions of Visual Studio will not work as they do not support enough of the C++17 standard.
- Clone the template project. Be sure to clone the entire project and not just copy and paste the cpp file.
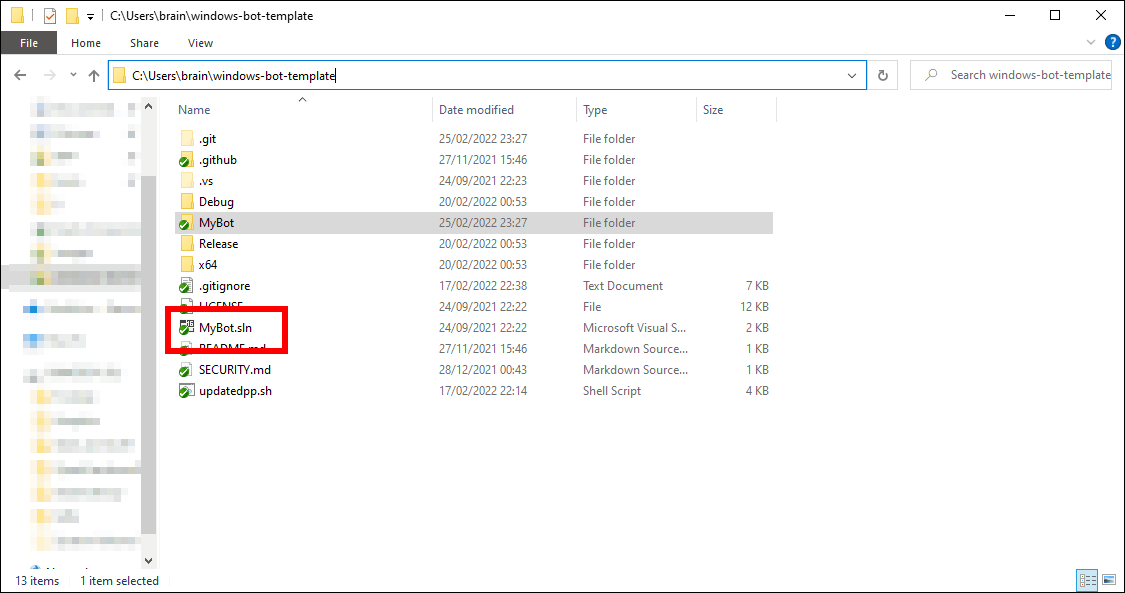
- Double click on the MyBot.sln file in the folder you just cloned
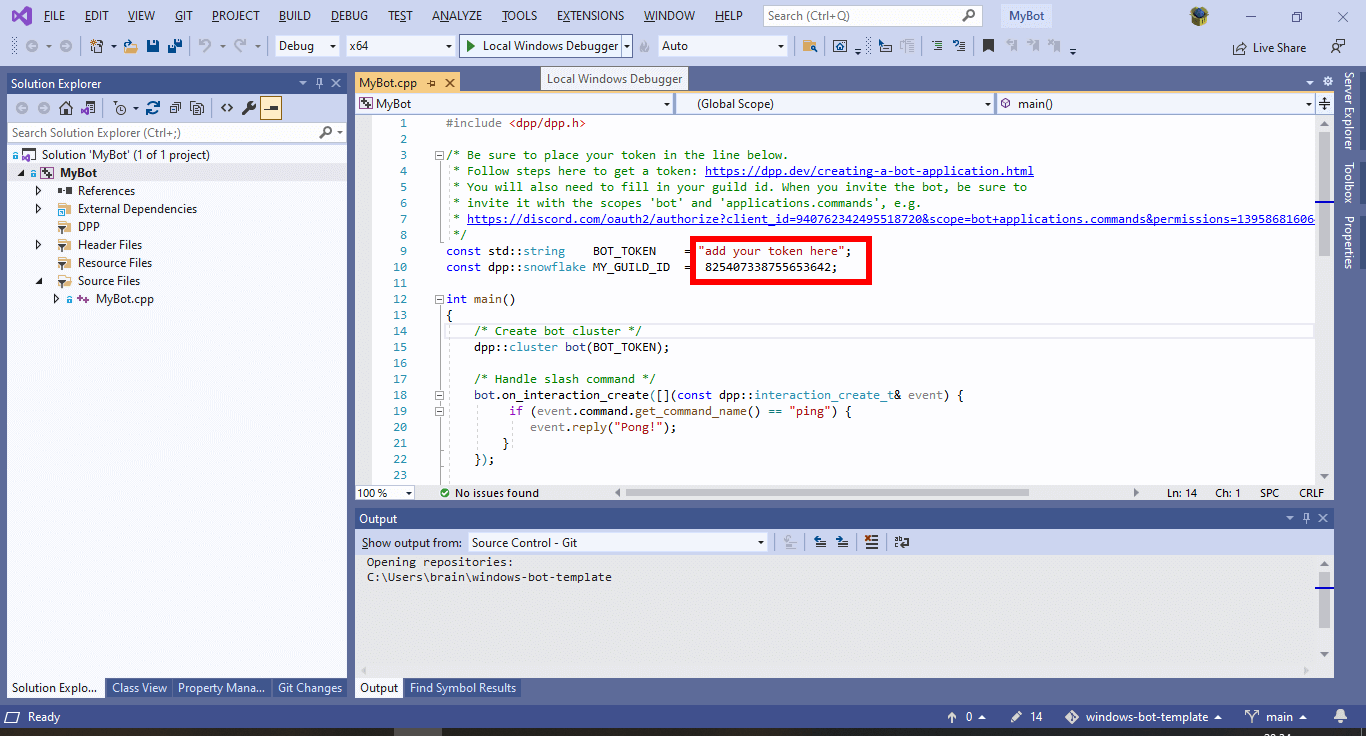
- Add your bot token (see Creating a Bot Token) and guild ID to the example program
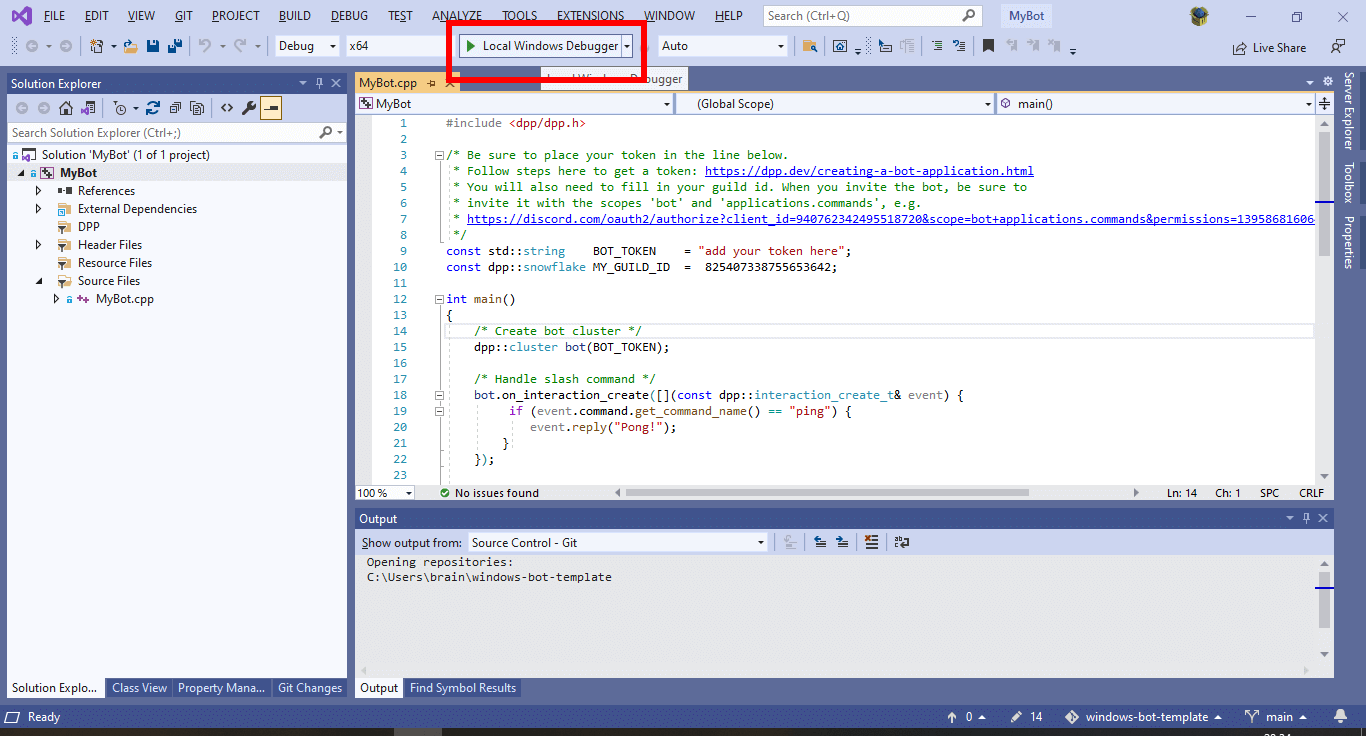
- Click "Local windows debugger" to compile and run your bot!
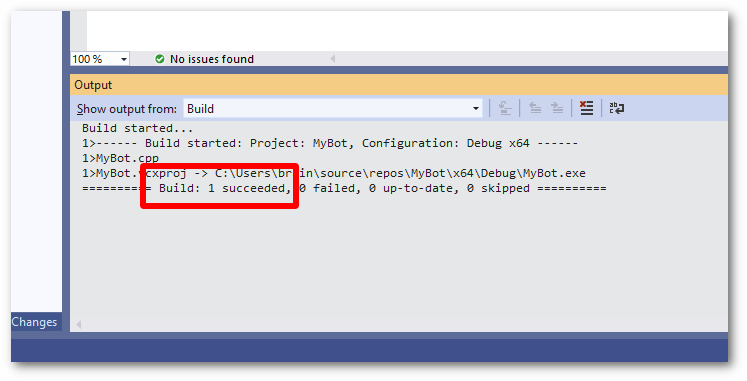
- Observe the build output. There may be warnings, but so long as the build output ends with "1 succeeded" then the process has worked. You may now run your bot!
Troubleshooting
- If you get an error that a dll is missing (e.g.
dpp.dll or opus.dll) when starting your bot, then simply copy all dlls from the bin directory of where you extracted the DPP zip file to, into the same directory where your bot's executable is. You only need to do this once. There should be several of these dll files: dpp.dll, zlib.dll, openssl.dll and libcrypto.dll (or similarly named SSL related files), libsodium.dll and opus.dll. Note the template project does this for you, so you should never encounter this issue.
- Stuck? You can find us on the official discord server - ask away! We don't bite!


